Givi Motorcycle Trunk Repair
- Andrew Asuelime
- Mar 10, 2019
- 4 min read
For the past 6+ years my primary form of transportation has been motorcycle. I commute to work and decided quite some time ago motorcycles were the best way to do that for numerous reasons
Cost of ownership
Use of carpool lanes
Great gas mileage
Free use of toll roads
And when traffic get's really bad there is lane splitting
When I first started riding I used to use a backpack for everything. But as I learned more about bikes I quickly discovered the benefits of cases (beware: a slew of motorcycle pics ahead, my late Yamaha FZ6 before I sold it). So I picked up a few used cases from ebay/craigslist.


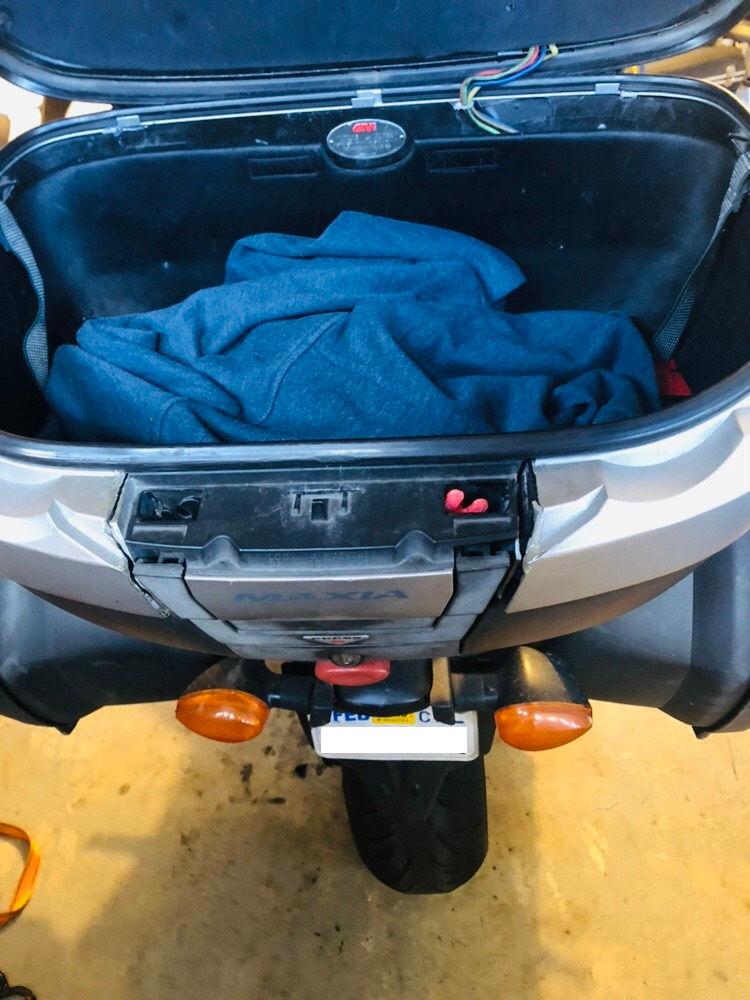
Well now to present day, one of the two latches in my trunk broke. Normally, it's fine, and stays closed, but sometimes on bumpy roads it opens up! so far nothing has fallen out, but its only a matter of time before it does. So I decided I could 3D print another latch.
This part had a surprisingly involved design. I imagine it started out as several pieces but was later combined into one part. It served as a spacer, the actual locking mechanism, holding the trunk closed, and being spring loaded to assist in opening it. It took a very long time to get the model just right. In fact it was so complex I didn't get it right the first time.
THE FIRST ATTEMPT


Armed with calipers, rulers, and protractors. I set to work modeling. At the time I didn't realize just how much functionality was in this small part. Since the original part was ABS I figured I'd make the replacement of the same material. It was very strong and from what I'd read, ABS fairs outdoor environments better than PLA.
This would be my very first 3D print and in ABS nonetheless. I've read things online about warpage, and how you need to closely monitor the temperature. I had access to an enclosed printer (Axiom Airwolf3D) so that helped. I downloaded the recommended APEX slicer and just threw my part on there. It seemed simple enough. I read about supports and rafting so I selected those options. I noticed there were a lot more supports the way my latch was exported, so I flipped it over: less supports. I raised the bed temperature and thought everything would be great, and here were the results...


Weeeeellllll, lets discuss what we see here. First there is the horrible finish on the sloping face. I planned on vapor smoothing the part to make it extra smooth, but boy did I have another thing coming. I think my nozzle was too hot and the support structure was VERY strongly attached. As you can see from the slicer model the supports were right on the sloping face. I had to do a lot of sanding to get it "right" and I use that term very loosely. No matter, it would be hidden anyway, s o even if it didn't look great I wouldn't mind. I took my part home with my head held high, ecstatic over my first successful print. It wasn't that hard after all.
I got home and started cleaning the part a little more with the other tools I had in the garage. Now the moment of truth: mounting the latch! It was then that I discovered I actually reversed some of the features! At least I could still get some real world data with my model so continued to fit the piece. I noticed my angles weren't quite right and the trunk required MUCH greater force to close (even though it wouldn't properly latch anyway). I also found out one side of my calipers (used to measure the inner diameter of the mount) was bent and the readings were slightly off, I really had to widen the hole so it would even go on the posts. Armed with this new data it was back to the 3D drawing board.
THE SECOND ATTEMPT
I figured out what I had done wrong. So there are two latches, essentially mirror images of one another. Since one was broken I was using the complete one for measurements. I started off great, remembering to mirror all the features. I took a break and when i came back I must've forgotten that detail, explaining how I arrived at my hodge podge mishap!
Ok so I started with the basics you know
Modeling everything in the correct orientation... check
Changing the angle of the loft feature... check
Changing the radius of the bushing... check
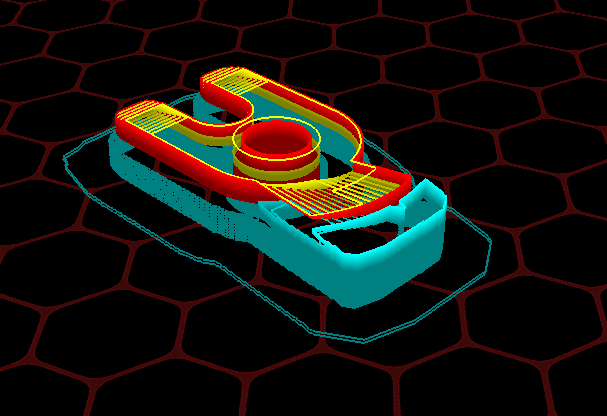
One thing I noticed about the print was how smooth the face facing the build plate was, it stood to reason. I would take advantage of that and split my part so one face of the part was flat. The remaining spacer would print separately. I wanted to split it so the sloping face was facing upwards, no supports, but the part geometry just didn't work out, the tab that hols the spring is on a different plane, which means more support material no matter how I sliced it (pun intended). Lastly, I lowered the nozzle temperature and went back to printing. Fingers crossed, would this be the part I envisioned? Let's take a look...


Besides the fact it was correctly modeled, the finish was much better this time. You can see each side is actually finished much better.
ASSEMBLY
A good looking part doesn't mean much if it doesn't fit, so it was time to put it in place. Here is the back of the assembly, you can see all the pieces together now. The sloping face is used when closing the lid, it will spring open when unlocked and it also forces you to put some pressure on the lid when you close it. The angle of the face decides how far the latch turns before it reaches the locked position. And the forks grasp onto the top part of the case.


LESSONS LEARNED
My oh my, what an informative experience. First time using a 3D printer. It's not as easy as making a good design and hitting print. There are so many settings to adjust: temperature, infill, speed, and then different ways to lay the part on the print bed. It all makes a huge difference. But it was a good experience and I'm looking forward to more projects in the future.


Comments