PVC Marimba Resonators
- Andrew Asuelime
- Mar 10, 2019
- 2 min read

This was a project I did some time ago adding some resonators to my marimba. Throughout my school life I've been in band: jazz band, jazz combo, marching band, wind ensemble, percussion ensemble, county honor band, city honor band, rock bands with friends, church choirs, piano classes, you name it. I'm principally a drummer, but I'm also a percussionist (among a few other instruments) and one of the instruments I really missed playing was the marimba.
What is a marimba you ask? well it's like a xylophone, most everyone has some idea of what that is, but it's much bigger, around 9 feet long, and 3 feet wide. It's a very mellow sounding instrument with wooden keys and below the keys are metal resonator tubes. Small amplifiers tuned to each note of the instrument, many of my friends say they remind them of a church organ, at least in appearance. The marimba can be played as a solo instrument or in an ensemble. These instruments are large and prohibitively expensive, but I found out about something called a "practice marimba." This is just the wooden keyboard without any resonator tubes (and consequently the warm rich tone and volume). This seemingly small change made a huge difference in price, making a marimba much more feasible. I've seen a few websites talking about building marimbas from scratch and saving a ton of money on the way, this seemed a bit far fetched for me requiring a bit of specialty equipment, but building tube resonators and adding them to a pre-built practice marimba sounded doable!
I made an excel sheet to calculate the length of tube needed depending on the standing wavelength of each note of the instrument and placed an order for a ton of PVC pipe. I didn't document the entire process but the basic outline was simple
Cut tubes to length
Fabricate bends in longer tubes
Paint tubes with a layer of truck-bedliner for texture
Paint tubes with silver to at least look metallic
Build a frame to hold resonators
Retrofit marimba to add resonators
Add stops and tune resonators
Play marimba to your hearts content
Now that I type it out, it doesn't look to simple. Anyway here are a very few pictures I saved from the process.


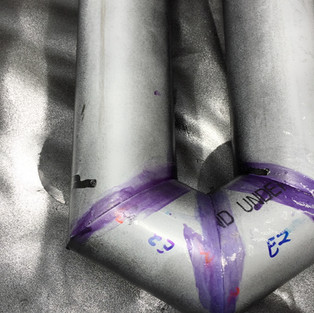


A few pictures of the longer resonators for the lower notes. I cut the pvc at 45* angle and then used pvc glue and patience to for these bends. I would've liked to make a smoother bend with more segments, but it was already a very trying process.


Comments